Gradle Tutorial
In this tutorial, you'll learn how to add Nx to a repository with an existing Gradle setup.
What will you learn?
- how to add Nx to a Gradle project
- how to run a single task (i.e. serve your app) or run multiple tasks in parallel
- how to leverage code generators to scaffold components
- how to modularize your codebase and impose architectural constraints for better maintainability
- how to speed up CI with Nx Cloud ⚡
Prerequisites
Make sure that you have Gradle installed on your system. Consult Gradle's installation guide for instruction that are specific to your operating system.
To verify that Gradle was installed correctly, run this command:
❯
gradle --version
Nx also requires NodeJS to be installed. If you do not have NodeJS installed, you can install it from the NodeJS website.
❯
node -v
Getting Started
This tutorial picks up where Spring framework's guide for Multi-Module Projects leaves off.
Fork the sample repository:
https://github.com/nrwl/gradle-tutorial
And then clone it on your local machine:
❯
git clone https://github.com/<your-username>/gradle-tutorial.git
The Multi-Module Spring Tutorial left us with 2 projects:
- The main
applicationproject which contains the SpringDemoApplication - A
libraryproject which contains a Service used in theDemoApplication
You can see the above 2 projects by running ./gradlew projects
❯
./gradlew projects
1> Task :projects
2
3------------------------------------------------------------
4Root project 'gradle-tutorial'
5------------------------------------------------------------
6
7Root project 'gradle-tutorial'
8+--- Project ':application'
9\--- Project ':library'
10
11
Add Nx
Nx is a build system with built in tooling and advanced CI capabilities. It helps you maintain and scale monorepos, both locally and on CI. We will explore the features of Nx in this tutorial by adding it to the Gradle workspace above.
To add Nx, run npx nx@latest init.
This command will download the latest version of Nx and help set up your repository to take advantage of it. Nx will also detect Gradle is used in the repo so it will propose adding the @nx/gradle plugin to integrate Gradle with Nx. Select the plugin and continue with the setup.
Similar to Gradle, Nx can be run with the nx or nx.bat executables. We will learn about some of the Nx commands in the following sections.
Explore Your Workspace
Like Gradle, Nx understands your workspace as a graph of projects. Nx uses this graph for many things which we will learn about in following sections. To visualize this graph in your browser, Run the following command and click the "Show all projects" button in the left sidebar.
You will recognize that the projects which are shown, are the same projects which Gradle shows. The @nx/gradle plugin reflects the graph of projects in Gradle into the Nx Project Graph. As projects are created, deleted, and change their dependencies, Nx will automatically recalculate the graph. Exploring this graph visually is vital to understanding how your code is structured and how Nx and Gradle behaves.
❯
./nx graph
Running Tasks
Nx is a task runner built for monorepos. It can run a single task for a single project, a task for all projects, and even intelligently run a subset of tasks based on the changes you've made in your repository. Nx also has sophisticated computation caching to reuse the results of tasks. We will explore how Nx adds to the task running Gradle provides.
Before we start running tasks, let's explore the tasks available for the application project. The @nx/gradle plugin that we've installed reflects Gradle's tasks to Nx, which allows it to run any of the Gradle tasks defined for that project. You can view the available tasks either through Nx Console or from the terminal:
❯
./nx show project application --web
The Nx command to run the build task for the application project is:
❯
./nx run application:build
When Nx runs a Gradle task, it hands off the execution of that task to Gradle, so all task dependencies and configuration settings in the Gradle configuration are still respected.
By running the task via Nx, however, the task computation was cached for reuse. Now, running ./nx run application:build again, will complete almost instantly as the result from the previous execution will be used.
❯
./nx run application:build
1
2   ✔  1/1 dependent project tasks succeeded [1 read from cache]
3
4   Hint: you can run the command with --verbose to see the full dependent project outputs
5
6—————————————————————————————————————————————————————————————————————————————————————————————————————————————————————————————————————————————————————————————————————————————————————————————————————————————————————————————
7
8
9> nx run application:classes  [existing outputs match the cache, left as is]
10
11> ./gradlew :application:classes
12
13> Task :library:compileJava UP-TO-DATE
14> Task :library:processResources NO-SOURCE
15> Task :library:classes UP-TO-DATE
16> Task :library:jar UP-TO-DATE
17> Task :application:compileJava UP-TO-DATE
18> Task :application:processResources UP-TO-DATE
19> Task :application:classes UP-TO-DATE
20
21BUILD SUCCESSFUL in 647ms
224 actionable tasks: 4 up-to-date
23
24> nx run application:build  [existing outputs match the cache, left as is]
25
26> ./gradlew :application:build
27
28
29Deprecated Gradle features were used in this build, making it incompatible with Gradle 9.0.
30
31You can use '--warning-mode all' to show the individual deprecation warnings and determine if they come from your own scripts or plugins.
32
33For more on this, please refer to https://docs.gradle.org/8.5/userguide/command_line_interface.html#sec:command_line_warnings in the Gradle documentation.
34
35BUILD SUCCESSFUL in 768ms
369 actionable tasks: 1 executed, 8 up-to-date
37
38—————————————————————————————————————————————————————————————————————————————————————————————————————————————————————————————————————————————————————————————————————————————————————————————————————————————————————————————
39
40 NX   Successfully ran target build for project application and 3 tasks it depends on (30ms)
41
42Nx read the output from the cache instead of running the command for 4 out of 4 tasks.
43
Now that we've run one task, let's run all the build tasks in the repository with the Nx run-many command. This is similar to Gradle's ./gradlew build command.
❯
./nx run-many -t build
1
2   ✔  nx run library:classes  [existing outputs match the cache, left as is]
3   ✔  nx run library:build  [existing outputs match the cache, left as is]
4   ✔  nx run application:classes  [existing outputs match the cache, left as is]
5   ✔  nx run application:build  [existing outputs match the cache, left as is]
6   ✔  nx run gradle-tutorial:classes (1s)
7   ✔  nx run gradle-tutorial:build (1s)
8
9—————————————————————————————————————————————————————————————————————————————————————————————————————————————————————————————————————————————————————————————————————————————————————————————————————————————————————————————
10
11 NX   Successfully ran target build for 3 projects and 3 tasks they depend on (2s)
12
13Nx read the output from the cache instead of running the command for 4 out of 6 tasks.
14
Again, because Nx cached the tasks when the application was built, most of the tasks here were near instant. The only ones which needed to be done is the root project's build. Running the command one more time, will be near instant as then all the tasks will be restored from the cache.
Run Tasks for Affected Projects
Nx doesn't just cache your task results, it can also eliminate the need to run unnecessary tasks.
First, commit any outstanding changes to the main branch locally:
❯
git commit -am "changes"
Next make a small change to the application code:
1package com.example.multimodule.application;
2
3import com.example.multimodule.service.MyService;
4import org.springframework.boot.SpringApplication;
5import org.springframework.boot.autoconfigure.SpringBootApplication;
6import org.springframework.web.bind.annotation.GetMapping;
7import org.springframework.web.bind.annotation.RestController;
8
9
10
11public class DemoApplication {
12
13 private final MyService myService;
14
15 public DemoApplication(MyService myService) {
16 this.myService = myService;
17 }
18
19
20 public String home() {
21 return myService.message() + " changed!";
22 }
23
24 public static void main(String[] args) {
25 SpringApplication.run(DemoApplication.class, args);
26 }
27}
28As a developer, we know that this change only affects the application project, not the library project. We would run ./nx run application:test to verify our changes. In CI, teams often run all test tasks rerunning the library:test task unnecessarily.
For a repository with only a few projects, you can manually calculate which projects are affected. As the repository grows, it becomes critical to have a tool like Nx that understands the project dependency graph and eliminates wasted time in CI.
The ./nx affected command solves this problem. Nx uses its project graph in conjunction with git history to only run tasks for projects that may have been affected by the changes that you made.
To run the test tasks for projects affected by this change, run:
❯
./nx affected -t test
Notice that this command does not run the test task for the library project, since it could not have been affected by the code change.
Fast CI ⚡
Repository with NxMake sure you have completed the previous sections of this tutorial before starting this one. If you want a clean starting point, you can check out the reference code as a starting point.
This tutorial walked you through how Nx can improve the local development experience, but the biggest difference Nx makes is in CI. As repositories get bigger, making sure that the CI is fast, reliable and maintainable can get very challenging. Nx provides a solution.
- Nx reduces wasted time in CI with the
affectedcommand. - Nx Replay's remote caching will reuse task artifacts from different CI executions making sure you will never run the same computation twice.
- Nx Agents efficiently distribute tasks across machines ensuring constant CI time regardless of the repository size. The right number of machines is allocated for each PR to ensure good performance without wasting compute.
- Nx Atomizer automatically splits large e2e tests to distribute them across machines. Nx can also automatically identify and rerun flaky e2e tests.
Connect to Nx Cloud
Nx Cloud is a companion app for your CI system that provides remote caching, task distribution, e2e tests deflaking, better DX and more.
Now that we're working on the CI pipeline, it is important for your changes to be pushed to a GitHub repository.
- Commit your existing changes with
git add . && git commit -am "updates" - Create a new GitHub repository
- Follow GitHub's instructions to push your existing code to the repository
Now connect your repository to Nx Cloud with the following command:
❯
npx nx connect
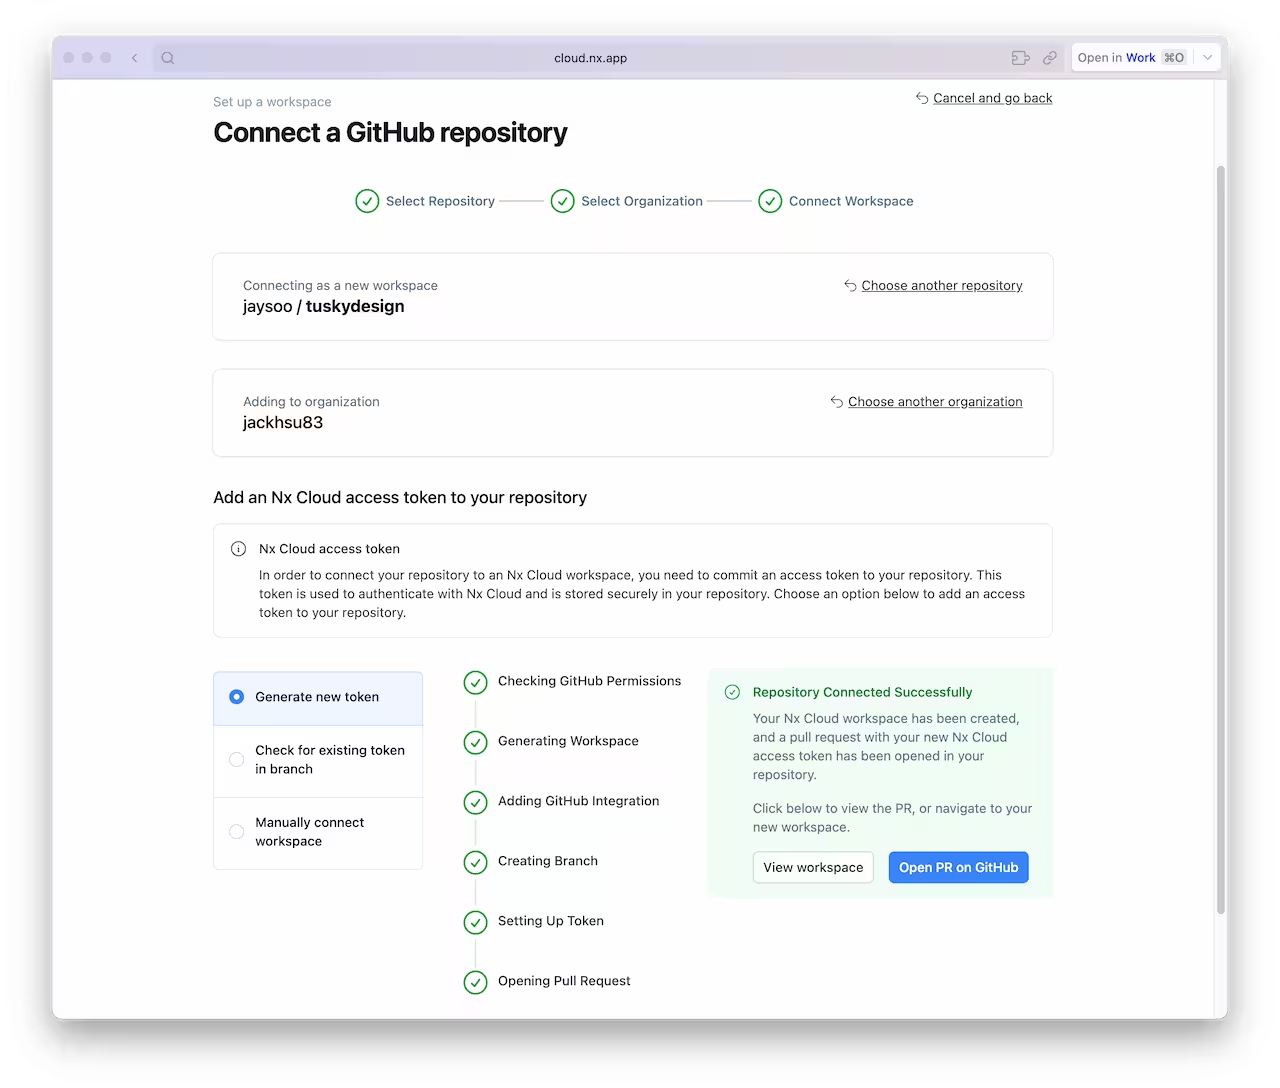
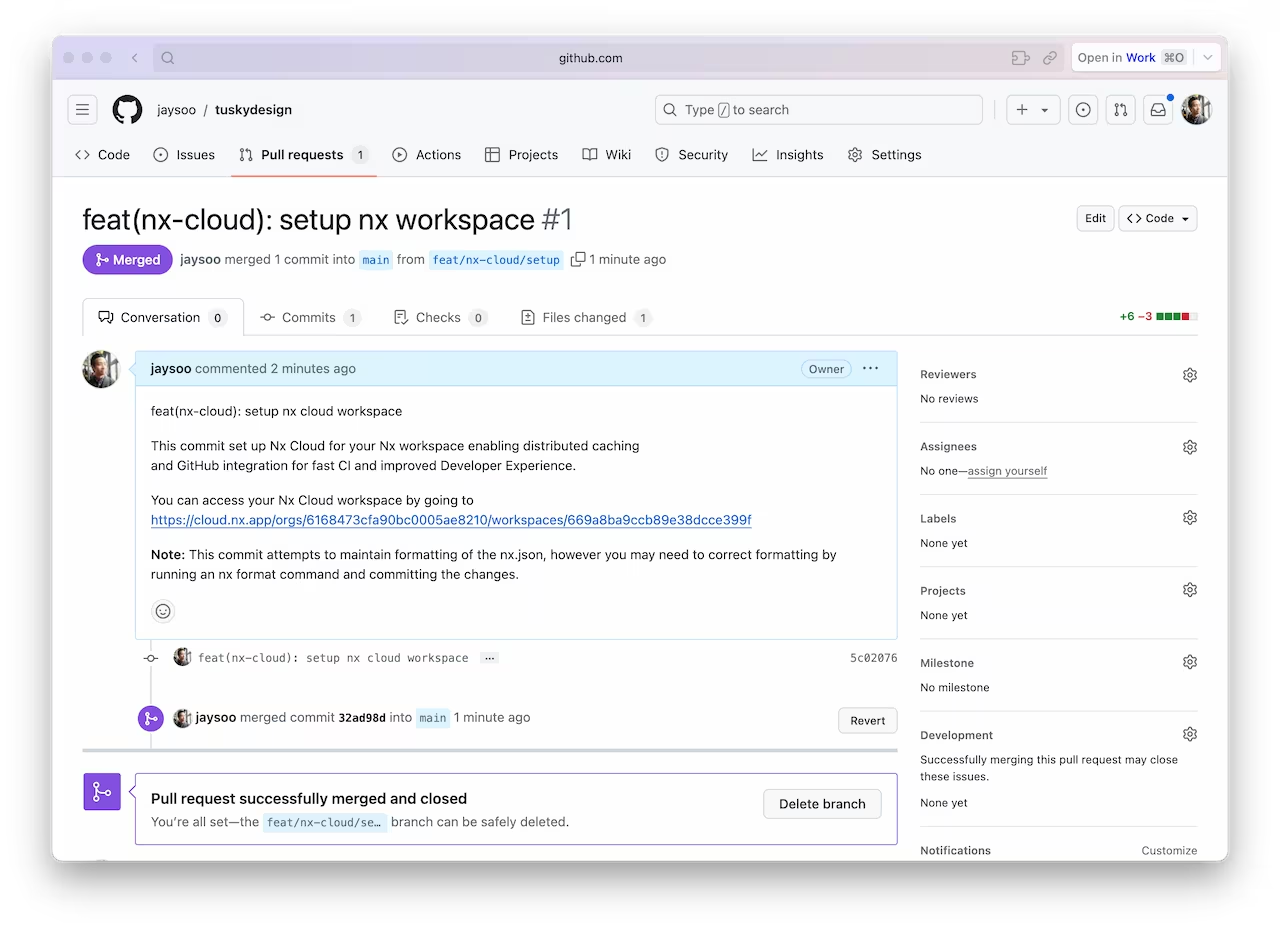
A browser window will open to register your repository in your Nx Cloud account. The link is also printed to the terminal if the windows does not open, or you closed it before finishing the steps. The app will guide you to create a PR to enable Nx Cloud on your repository.

Once the PR is created, merge it into your main branch.

And make sure you pull the latest changes locally:
❯
git pull
You should now have an nxCloudAccessToken property specified in the nx.json file.
Create a CI Workflow
Let's create a branch to add a CI workflow.
❯
git checkout -b add-workflow
And use the following command to generate a CI workflow file.
❯
npx nx generate ci-workflow --ci=github
This generator creates a .github/workflows/ci.yml file that contains a CI pipeline that will run the lint, test, build and e2e tasks for projects that are affected by any given PR. Since we are using Nx Cloud, the pipeline will also distribute tasks across multiple machines to ensure fast and reliable CI runs.
The key lines in the CI pipeline are:
1name: CI
2# ...
3jobs:
4  main:
5    runs-on: ubuntu-latest
6    steps:
7      - uses: actions/checkout@v4
8        with:
9          fetch-depth: 0
10      # This enables task distribution via Nx Cloud
11      # Run this command as early as possible, before dependencies are installed
12      # Learn more at https://nx.dev/ci/reference/nx-cloud-cli#npx-nxcloud-startcirun
13      # Connect your workspace by running "nx connect" and uncomment this
14      - run: npx nx-cloud start-ci-run --distribute-on="3 linux-medium-js" --stop-agents-after="build"
15      - uses: actions/setup-node@v3
16        with:
17          node-version: 20
18          cache: 'npm'
19      - run: npm ci --legacy-peer-deps
20      - uses: nrwl/nx-set-shas@v4
21      # Nx Affected runs only tasks affected by the changes in this PR/commit. Learn more: https://nx.dev/ci/features/affected
22      - run: npx nx affected -t lint test build
23
Open a Pull Request
Commit the changes and open a new PR on GitHub.
❯
git add .
❯
git commit -m 'add CI workflow file'
❯
git push origin add-workflow
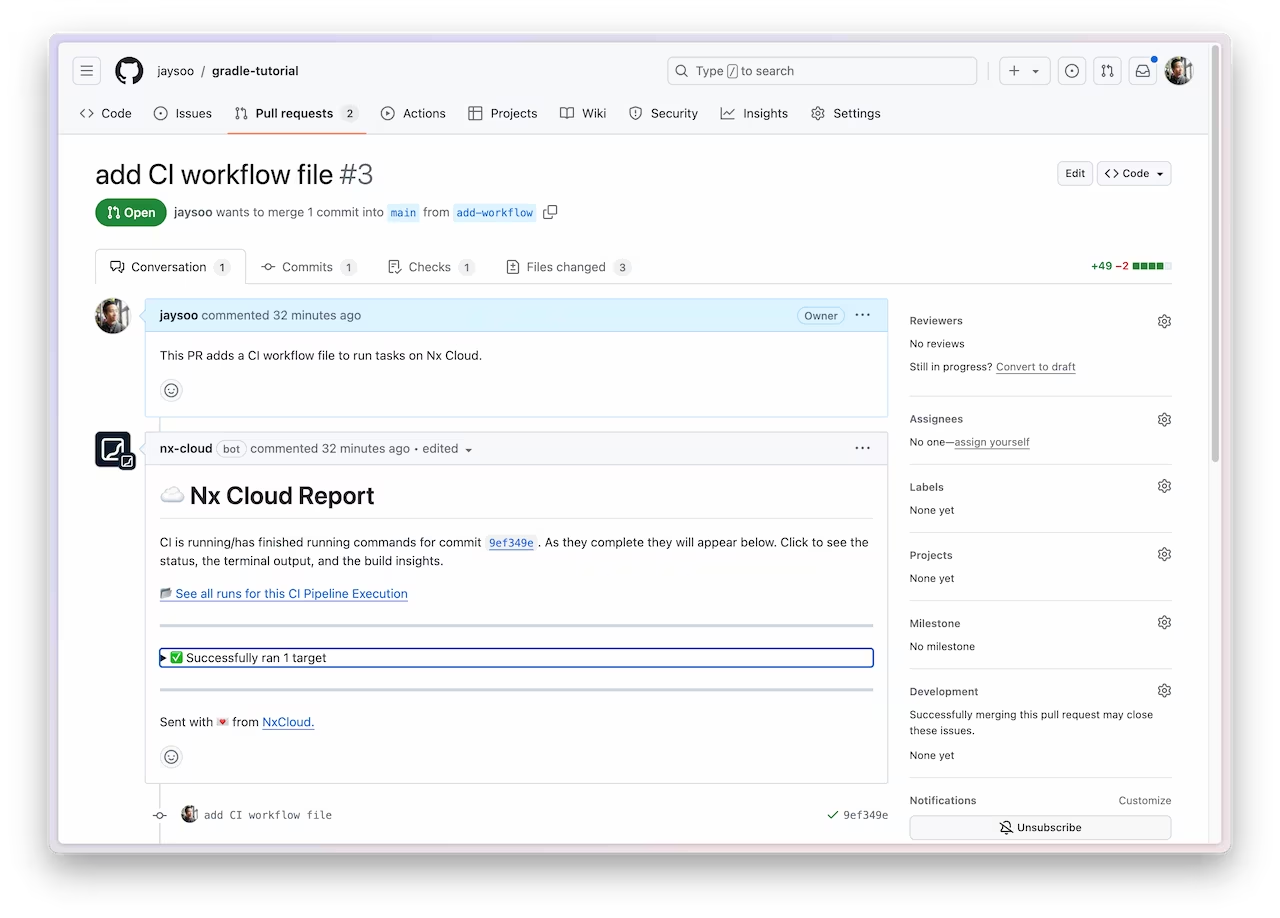
When you view the PR on GitHub, you will see a comment from Nx Cloud that reports on the status of the CI run.

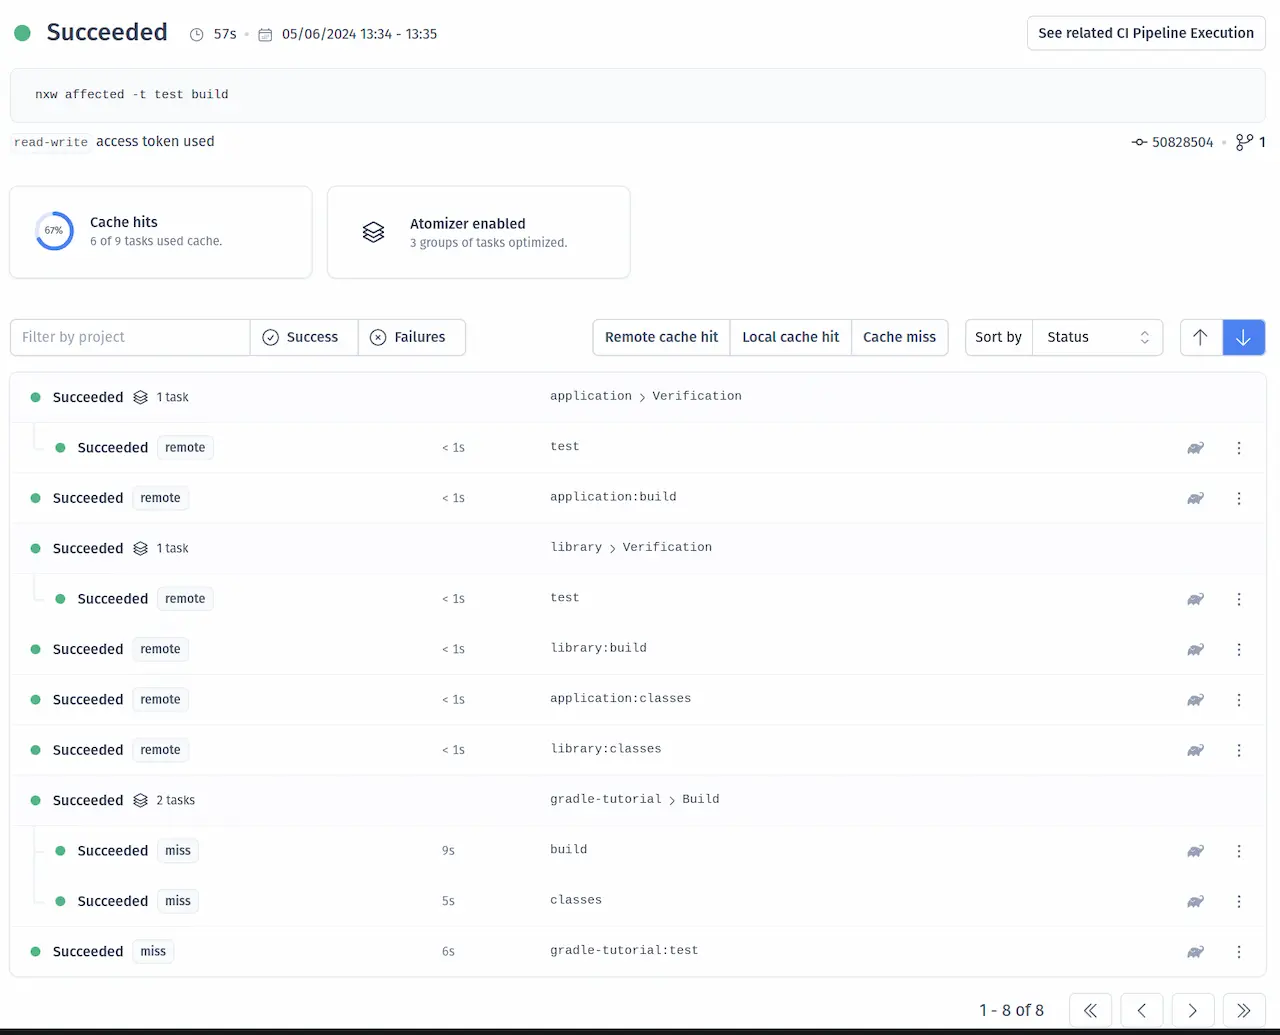
The See all runs link goes to a page with the progress and results of tasks that were run in the CI pipeline.

For more information about how Nx can improve your CI pipeline, check out one of these detailed tutorials:
Summary
Now that you have added Nx to this sample Gradle repository, you have learned several ways that Nx can help your organization:
- Nx reflects the Gradle graph into the Nx graph
- Nx's dependency graph visualisation helps you understand your codebase
- Nx caches task results and reuses them when the same task is rerun later
- Nx intelligently determines which tasks are
affectedby code changes to reduce waste in CI - Nx Cloud provides remote caching and distributed task execution to speed up CI
Next Steps
Connect with the rest of the Nx community with these resources:
- Join the Official Nx Discord Server to ask questions and find out the latest news about Nx.
- Follow Nx on Twitter to stay up to date with Nx news
- Read our Nx blog
- Subscribe to our Youtube channel for demos and Nx insights